Welcome to Part 3 of setting up a Gitlab CI pipeline for a Flutter project. In Part 1, you learned how to configure a Flutter application with different flavors. Then in Part 2, we showed you how to Configure Android and iOS Release Modules.
Now, our Flutter application is ready for its Continuous Integration. We will be using Gitlab CI as our CI/CD tool in our current demo. So, let’s start.
Part 3 – Configure Gitlab for Flutter CI-CD & Perform Pipeline Actions
Gitlab CI uses the Gitlab Runners as their build executors. They are nothing but machines where your pipeline will be executed. In order for your Flutter pipeline to be executed, you will need to install, configure (if required) and register Gitlab Runner on a machine preferably a Mac machine for supporting the iOS builds in Flutter with Android.
You can install software for the Gitlab Runner and register your mac machine following this documentation:
NOTE: In this example, we have used shell as our executor inside the runner.
This is equivalent to our pipeline being executed directly in a shell inside our Gitlab CI Runner machine.
Now, you are all set to use a Gitlab pipeline. But in order for the build to take place, you will need some these essential building tools installed on your gitlab runner machine. These are listed in the Prerequisites.
Prerequisites:
- Gitlab Repository containing your code
- Homebrew
- Flutter
- Android Studio
- Xcode
- The certificates and mobileprovisions required for the project build installed on the Gitlab CI machine
Lastly, a Gitlab pipeline is all you need here.
Gitlab uses a file named “.gitlab-ci.yml” (don’t forget the dot and the case) at the project root to identify whether to run a pipeline for that particular repository. Gitlab takes the pipeline configuration from the .gitlab-ci.yml file.
It is assumed that we are using the ci-cd directory structure specified in the previous posts. To refresh it, the typical file structure will be the following for this post (please follow the case as well):

The below file is the .gitlab-ci.yml file which you will need to add to your project root to get started with your pipeline!
Please edit the variables in the “<>” as per your Xcode project name and Flavor. We have used the flavor production for this demo. You can modify it as per your use case.
variables:
  IOS_XCODE_PROJECT_NAME: "<YOUR_XCODE_PROJECT_NAME>"
  FLAVOR: "production"

stages:
  - archive

android:debug:
  stage: archive
  before_script:
    - flutter packages get
    - flutter clean
  script:
    - flutter doctor --android-licenses
    - flutter build apk --flavor ${FLAVOR} --debug
  artifacts:
    paths:
      - "**/**/**/**/**/**/*.apk"
    expire_in: 1 day

android:release:
  stage: archive
  before_script:
    - flutter packages get
    - flutter clean
  script:
    - flutter doctor --android-licenses
    - flutter build apk --flavor ${FLAVOR} --release
  artifacts:
    paths:
      - "**/**/**/**/**/**/*.apk"
    expire_in: 1 day

ios:debug:
  stage: archive
  before_script:
    - flutter packages get
    - flutter clean
  script:
    - flutter build ios --flavor ${FLAVOR}
    - if [ -d archive ]; then rm -rf archive; fi && mkdir archive
    - if [ -d artifact ]; then rm -rf artifact; fi && mkdir artifact
    - export PLIST_DIRECTORY="ci-cd/iOS/${FLAVOR}/debug"
    - cd ios
    - pod install;
    - xcodebuild clean archive -quiet -workspace ${IOS_XCODE_PROJECT_NAME}.xcworkspace -scheme ${FLAVOR} -archivePath "../archive/${IOS_XCODE_PROJECT_NAME}.xcarchive";
    - xcodebuild -quiet -exportArchive -archivePath  "../archive/${IOS_XCODE_PROJECT_NAME}.xcarchive" -exportPath ../artifact/ -exportOptionsPlist ${PLIST_DIRECTORY}/*.plist
  artifacts:
    paths:
      - "artifact/*.ipa"
    expire_in: 1 day

ios:release:
  stage: archive
  before_script:
    - flutter packages get
    - flutter clean
  script:
    - flutter build ios --flavor ${FLAVOR}
    - if [ -d archive ]; then rm -rf archive; fi && mkdir archive
    - if [ -d artifact ]; then rm -rf artifact; fi && mkdir artifact
    - export PLIST_DIRECTORY="ci-cd/iOS/${FLAVOR}/release"
    - cd ios
    - pod install;
    - xcodebuild clean archive -quiet -workspace ${IOS_XCODE_PROJECT_NAME}.xcworkspace -scheme ${FLAVOR} -archivePath "../archive/${IOS_XCODE_PROJECT_NAME}.xcarchive";
    - xcodebuild -quiet -exportArchive -archivePath  "../archive/${IOS_XCODE_PROJECT_NAME}.xcarchive" -exportPath ../artifact/ -exportOptionsPlist ${PLIST_DIRECTORY}/*.plist
  artifacts:
    paths:
      - "artifact/*.ipa"
    expire_in: 1 day
The typical anatomy of the above file is:
- variables: This section consists of key-value pairs with the variable names as the keys and the variable value as the value of that key to use throughout our pipeline.
- stages: This section identifies the sequential order of the steps we are going to run for our pipeline, eg: in our case it is archive
- jobs: This section is a collection of steps for a particular stage. For eg: archive is a stage and android:debug is a job which will contain the collection of steps required for building the Flutter android debug artifact. The similar is true for ios:debug.
- before_script: This section will contain the script to be executed before executing the job’s scripts. This is mainly used for the purpose of fetching packages, cleaning the workspace, etc.
- script: This section will contain the actual job scripts to be executed in the Gitlab machine’s shell for a particular job.
- steps: These are smallest unit of execution are the steps executed as a part of the script.
- artifacts: This section allows us to define artifacts i.e build result we want to store when a job is completed. We have kept a default timeout for the artifacts to be stored on Gitlab server to 1 day. We would store the apk and ipa builds as artifacts after the execution of the Android and iOS build jobs respectively.
A detailed overview of each job is:
android:debug
- flutter packages get
- flutter clean
These commands will fetch the packages and clear the workspace before initiating the build.
- flutter doctor --android-licenses
- flutter build apk --flavor ${FLAVOR} --debug
These commands will accept the android licenses and post it, the build command will be executed in order to build the artifact corresponding to production flavor and debug profile.
android:release:
- flutter build apk --flavor ${FLAVOR} --release
The steps mentioned in android:debug will remain common in android:release job except this job will create a build corresponding to production flavor and release mode.
ios:debug:
- flutter build ios --flavor ${FLAVOR}
This command will first build flutter components of iOS corresponding to the production flavor.
- if [ -d archive ]; then rm -rf archive; fi && mkdir archive
- if [ -d artifact ]; then rm -rf artifact; fi && mkdir artifact
These commands will then create directories for storing the archive and the artifact.
- cd ios
Then we make the ios direcctory as our current directory.
- export PLIST_DIRECTORY="ci-cd/iOS/${FLAVOR}/debug"
And we export the Plist file path.
- pod install;
- xcodebuild clean archive -quiet -workspace ${IOS_XCODE_PROJECT_NAME}.xcworkspace -scheme ${FLAVOR} -archivePath "../archive/${IOS_XCODE_PROJECT_NAME}.xcarchive";
These commands install the pods mentioned in a Podfile and creates archive using the xcodebuild utility with the input Plist for production and debug mode. We are using the xcworkspace here. The command options will change if you are using a xcodeproj.
- xcodebuild -quiet -exportArchive -archivePath "../archive/${IOS_XCODE_PROJECT_NAME}.xcarchive" -exportPath ../artifact/ -exportOptionsPlist ${PLIST_DIRECTORY}/*.plist
It exports the archive to the project root’s artifact directory.
ios:release:
- export PLIST_DIRECTORY="ci-cd/iOS/${FLAVOR}/release"
The steps mentioned in ios:debug will remain common in ios:release except exporting the Plist path to the Plist file corresponding to production and release mode.
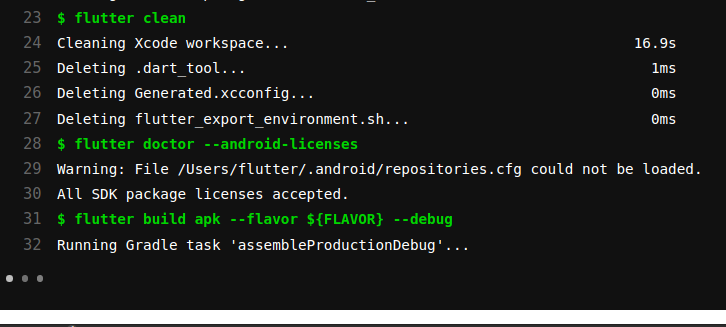
The output of the steps will be in this manner:
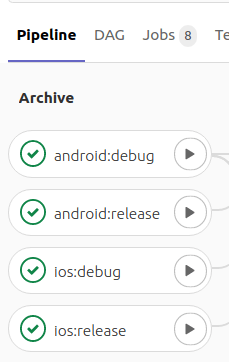
And the pipeline will look like:
Finally, we have our Flutter pipeline up and running! We hope that whoever has reached to this final note has successfully configured Gitlab CI-CD pipeline for their Flavored Flutter Application.
Happy coding!
Related Posts
Digital Transformation Strategy for 2022: First Steps, Benefits, Technology
Digital transformation is a movement to modify existing business processes to meet the needs to today’s digital age.
Android vs iOS Which Platform to Build Your App for?
Android vs iOS Which Platform to Build Your App for? Discover pros and cons, demographic information, pricing, development timeline, and…
#1 Mobile Application Development Company in New Jersey
Sunflower Lab is a mobile app development company in New Jersey. This is how we set ourselves apart from the competition.
Get a FREE estimate for your project today.
Our team of experts will review your project and give you a quote at no cost.
You might also like
Stay ahead in tech with Sunflower Lab’s curated blogs, sorted by technology type. From AI to Digital Products, explore cutting-edge developments in our insightful, categorized collection. Dive in and stay informed about the ever-evolving digital landscape with Sunflower Lab.