If you want to run commands on the AWS EC2 Instance tool using Jenkins, this blog can help you to connect your self-hosted Jenkins with AWS EC2 Instance, using the SSH remote host plugin provided by Jenkins.
Pre-requisites
- One Up & Running AWS – EC2 Instance
- One UP & Running Jenkins Server
- AWS EC2 Public IP Address
- AWS EC2 Pem File
Step 1
- Go to: Jenkins -> Manage Jenkins -> Manage Plugins -> Available Tab
- Search For ‘SSH Plugin‘
- Download and Install that Plugin
The plugin shall appear in the installed tab.
![]()
Step 2
- Go to: Jenkins -> Manage Jenkins -> Configure System
Now “SSH remote hosts” option will appear on this page.
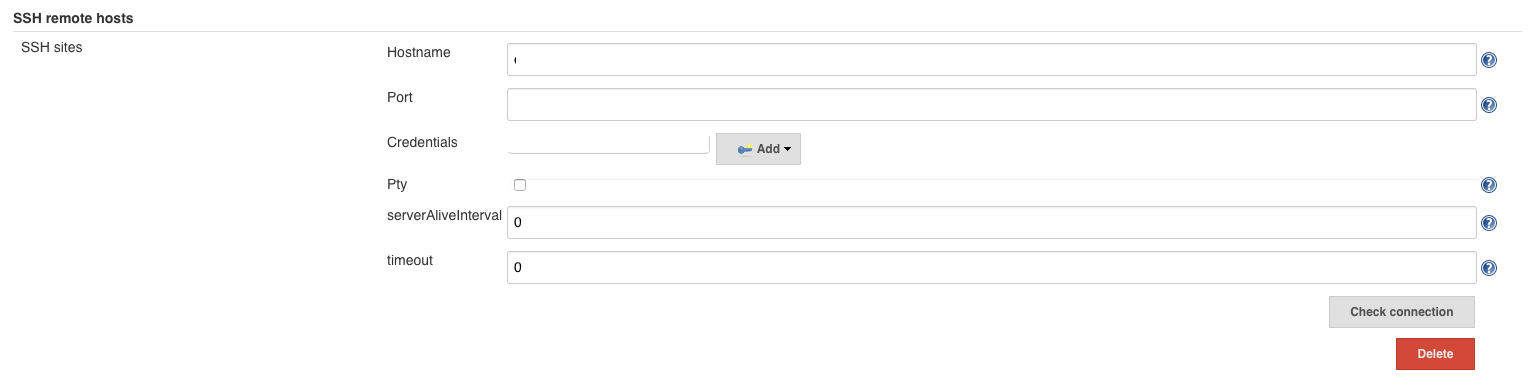
- “Add” button will appear in the SSH remote hosts section.
- This plugin can connect multiple EC2 Instances.
- Add button will ask for a number of parameters as described in the image above.
Parameter Values
- Hostname: Public IP of EC2 Instance or any Domain name of EC2 Instance
- Port: 22 ‘Because 22 Port is for SSH Connections’
- pty, serverAliveInterval, timeout: put the value as described in above image
- Need to Add Credentials by clicking Add button next to Credentials Drop Down.
Step 3
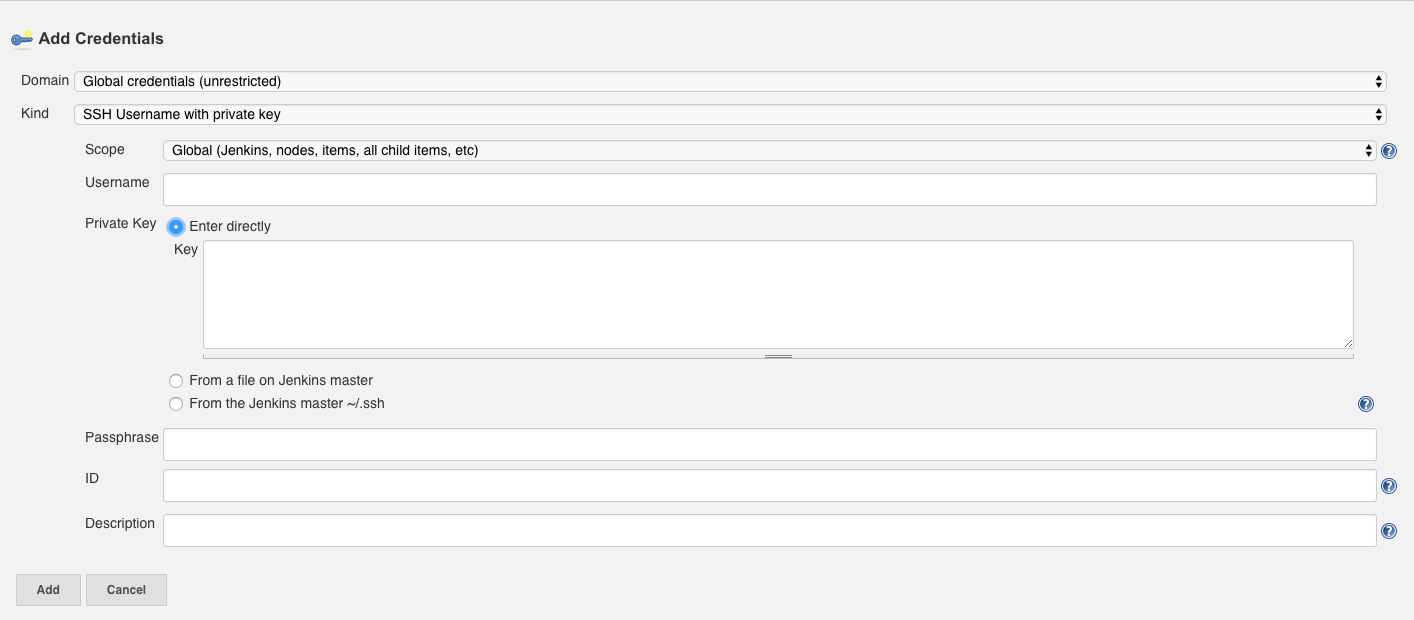
- Add Credentials Popup will appear as explained in the image above.
Parameter Values
- Kind: SSH Username with Private Key
- Scope: Global
- Username: ec2-user ‘or Any Username of your AWS EC2 Instance’
- Private Key: Select ‘Enter directly’. Here we will add Pem file
- Key: Open Pem file with text -> Copy Content -> Paste here.
- Passphrase: leave it blank
- ID: leave it blank
- Description: Put any Name for your Connection.
Step 4
- Back to SSH remote hosts in Manage Jenkins -> Configure System.
- Select the credentials that you created recently.
- Then hit ‘Check Connection’ Button.
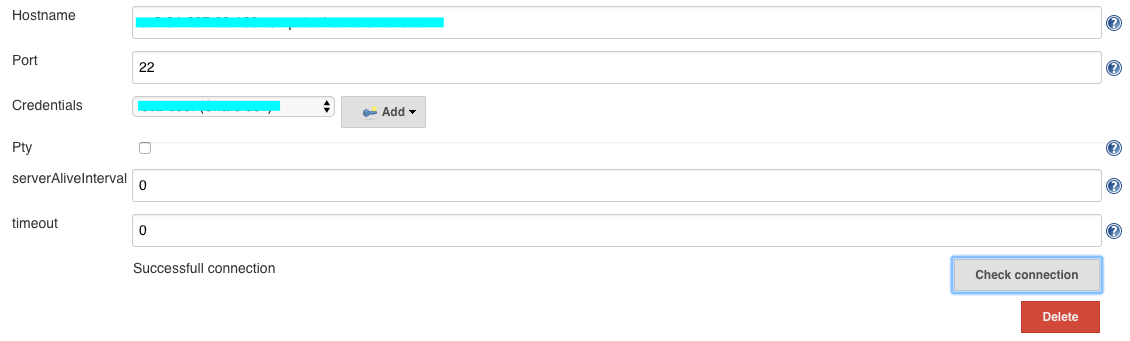
? Congratulations! You successfully Integrated Jenkins with AWS EC2 using SSH remote host.
You might also like
Stay ahead in tech with Sunflower Lab’s curated blogs, sorted by technology type. From AI to Digital Products, explore cutting-edge developments in our insightful, categorized collection. Dive in and stay informed about the ever-evolving digital landscape with Sunflower Lab.