Today we’ll learn how to make async HTTP POST Request in React Native. I hope you have setup the basic environment for react native. Also you have setup the basic editor for React Native. I am using the Visual Studio Code editor to write React Native Script, and if you want to write the script only for React Native, I suggest you should use Deco IDE tool. In this tutorial we will make a login page where users can log in with their email address and password, and authenticate them using the HTTP Post Request.
So, after setting up the basic IDE tool for React Native, we need to create a project using the command stated below:
react-native init HTTPRequest
It will download all necessary files and create a ‘HTTPRequest’ project for you in the directory. After downloading all necessary file, open the project in your IDE tool and execute the command below to install the application simulator.
react-native run-ios
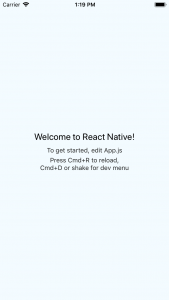
If everything goes correct, you shall see a screen in the iOS Simulator. For this tutorial we don’t need the default script, so go to the App.js file and remove all of the code.
"use strict";
import React, { Component } from "react";
import {
StyleSheet,
View,
TextInput,
Button,
} from "react-native";
In the code stated above we have to import react native and its necessary components needed for making a simple UI for the login page. So we shall create a default class and add the state with two property – Email Address and Password – in the constructor function. We will store the user email address and password in these two properties to take inputs from the end user.
export default class App extends Component {
constructor(props) {
super(props);
this.state = {
emailAddress: "",
passWord: ""
};
}
}
Now, we have created our simple login page. But if you try to run the application, it will give you an error since we haven’t render the login view. To do that, we have to write the code below underneath of the constructor page.
onPressSubmitButton() {
// this.onFetchLoginRecords();
}
render() {
return (
<View style={loginStyles.container}>
<TextInput
ref="txtEmail"
style={loginStyles.textInput}
placeholder="Email Address"
keyboardType="email-address"
returnKeyType="next"
onSubmitEditing={event => {
this.refs.txtPassword.focus();
}}
onChangeText={text => this.setState({ emailAddress: text })}
/>
<TextInput
ref="txtPassword"
style={loginStyles.textInput}
placeholder="Password"
returnKeyType="done"
secureTextEntry={true}
onChangeText={text => this.setState({ passWord: text })}
/>
<Button
title="Submit"
color="#841584"
onPress={this.onPressSubmitButton.bind(this)}
/>
</View>
);
}
I have created a style sheet to add it to the login page below. However, you could create your own CSS. FlexBox offers a great tutorial to help you get started.
const loginStyles = StyleSheet.create({
container: {
flex: 1,
alignItems: "center",
justifyContent: "center",
flexDirection: "column",
backgroundColor: "#F5FCFF"
},
textInput: {
height: 40,
textAlign: "center",
borderWidth: 1,
width: "80%"
},
buttonSubmit: {
color: "#841584"
}
});
We’re almost completed. We have enough code to create the login page layout. You can run the application now and it will display in iOS.
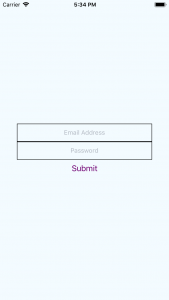
Now add the async method below in the code above , on the onPressSubmitButton property and un-comment the line.onFetchLoginRecords will call async http request. The async function will execute our code – It is the beauty of the React Native Library.
async onFetchLoginRecords() {
var data = {
email: this.state.emailAddress,
password: this.state.passWord
};
try {
let response = await fetch(
"http://yourdomain.com",
{
method: "POST",
headers: {
"Accept": "application/json",
"Content-Type": "application/json"
},
body: JSON.stringify(data)
}
);
if (response.status >= 200 && response.status < 300) {
alert("authenticated successfully!!!");
}
} catch (errors) {
alert(errors);
}
}
Now if you run the application on iOS and make the HTTP request call, it will give an error in iOS because of the Apple HTTP Transport Security. So to solve that you need to add Exceptions and domain key in the info. Plist the file mentioned below.
<key>NSAppTransportSecurity</key>
<dict>
<key>NSExceptionDomains</key>
<dict>
<key>localhost</key>
<dict>
<key>NSExceptionAllowsInsecureHTTPLoads</key>
<true/>
</dict>
<key>yourdomain.com</key>
<dict>
<key>NSIncludesSubdomains</key>
<true/>
<key>NSTemporaryExceptionAllowsInsecureHTTPLoads</key>
<true/>
<key>NSTemporaryExceptionMinimumTLSVersion</key>
<string>TLSv1.1</string>
</dict>
</dict>
</dict>
Sunflower Lab is a custom apps and mobile software development company based in Columbus, Ohio. Voted as “Top Custom Software Development Company of 2017” by Clutch – A top B2B marketplace to find companies who are experts in their domains – Sunflower Lab offers many IT based premium quality services including mobile app development, web development, cloud development, custom software development, graphic design and strategic consulting. Visit the website now to know more about our quality development services and engagement process.
Interested in other technology topics by Sunflower Lab? We have an entire series of articles specially created for you! Subscribe to our newsletters.
You might also like
Stay ahead in tech with Sunflower Lab’s curated blogs, sorted by technology type. From AI to Digital Products, explore cutting-edge developments in our insightful, categorized collection. Dive in and stay informed about the ever-evolving digital landscape with Sunflower Lab.