ReactJs Environment Setup Steps
In this article we are going to see how to setup our Reactjs Project Environment, with the help of this article you will be able to set up Reactjs Project Based Environment and learn what are the basic packages, files & folders need to be installed and create before you been your actual Project.

For Implementation follow steps as below:
1. Create the folder for the project. Open command-line on that folder and type command.
npm init |
2. Now install two libraries with –save, which let it know these given libraries are for production, you can check in package.json after completion of below command. Can find Two productions Dependencies.
npm install react react-dom --save |
3. Now we will include our development dependencies, webpack for binding our work, webpack-dev will be the development server, babel-loader act as a loader, –save-dev is used for development dependencies which will not be loaded in production, type following command.
npm install webpack webpack-dev-server babel-loader babel-core babel-preset-es2015 babel-preset-react babel-preset-stage-2 --save-dev |
4. Create an src folder in your project where you will be keeping all your source code.
5. In src, create folder name app and filename index.html(this will the main entry point of our application).
6. Create a file in your project folder name webpack.config.js and copy the following code.
var path = require("path");var DIST_DIR = path.resolve(__dirname, "dist");var SRC_DIR = path.resolve(__dirname, "src");var config = { entry: SRC_DIR + "/app/index.js", output: { path: DIST_DIR + "/app", filename: "bundle.js", publicPath: "/app/" }, module: { loaders: [{ test: /\.js?/, include: SRC_DIR, loader: "babel-loader", query: { presets: ["react", "es2015", "stage-2"] }}]}}; module.exports = config; |
7. Create a new file in app folder with name index.js print console message.
console.log("Mitesh Project") |
8. Now edit the index.html file and copy following code.
<!doctype html><html lang="en"><head><meta charset="UTF-8"><meta name="viewport" content="width=device-width, user-scalable=no, initial-scale=1.0, maximum-scale=1.0, minimum-scale=1.0"><meta http-equiv="X-UA-Compatible" content="ie=edge"><title>ReactJS Basics </title><link rel ="stylesheet" href="https://maxcdn.bootstrapcdn.com/bootstrap/4.0.0-beta/css/bootstrap.min.css" integrity="sha384-/Y6pD6FV/Vv2HJnA6t+vslU6fwYXjCFtcEpHbNJ0lyAFsXTsjBbfaDjzALeQsN6M" crossorigin="anonymous"></head><body><div id="app"></div><script src="/app/bundle.js"></script></body></html> |
9. For running your project you need to make some changes in the package.json file simply replace script tag with the following code.
For Windows users:
"scripts": {"start": "npm run build","build": "webpack -d && xcopy \"src/index.html\" \"dist/\" /F /Y && webpack-dev-server --content-base src/ --inline --hot","build:prod": "webpack -p && xcopy \"src/index.html\" \"dist/\" /F /Y" } |
For MAC users:
"scripts": {"start": "npm run build","build": "webpack -d && cp src/index.html dist/index.html && webpack-dev-server --content-base src/ --inline --hot","build:prod": "webpack -p && cp src/index.html dist/index.html } |
10. Your setup is completed now just type this on the command line(make sure you’re in the project folder).
npm start |
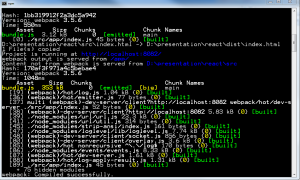
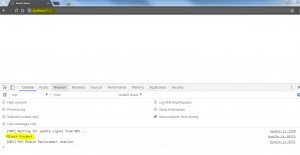
You can see in command line project is running on http://localhost:8082 Open it in your browser and see in your browser console can see console message there.
That’s it, Congratulations You’re setup is up and running.
You might also like
Stay ahead in tech with Sunflower Lab’s curated blogs, sorted by technology type. From AI to Digital Products, explore cutting-edge developments in our insightful, categorized collection. Dive in and stay informed about the ever-evolving digital landscape with Sunflower Lab.


